A DIY Recipe: How to make Play dough (play-doh)
Play Dough is a classic toy that children (and adults!) just love to play with. I made my batch of play dough from this website for my *adults only* best friend's hens night a few weeks ago. But this was so easy to make at home and it's such a cheaper and more safer option than the store bought kind for children as well.
Ingredients (for each colour batch; makes a standard zip lock bag size):
2 cups flour
1 cup salt
2 tablespoons vegetable oil
2 cups warm water
1 tablespoon Cream of Tartar (this is optional, but it does improve play dough elasticity)
A range of food colouring
Scented oil (optional)
Step 1 (cook): Mix all the ingredients together in a bowl, transfer to a pot and stir over low heat. The dough is sloppy at first, but soon it starts to look like mashed potato/smashed peas after a few minutes.
When the dough starts to pull away from the sides and clump in the middle and becomes thick and dense in texture, remove from heat. If dough still looks sticky, just keep cooking until it starts to resemble play dough. Don't worry, it will happen! (I freaked out for a bit thinking I ruined the play dough when my first batch was so sticky and gooey for such a long time). Allow the dough to cool in pot before handling it.
Step 2 (Knead and add colouring): When the dough is cool to touch, transfer it to a clean surface (I used my chopping board). You can then divide the dough for smaller batches if required. Then knead the dough until its smooth and free of lumps.
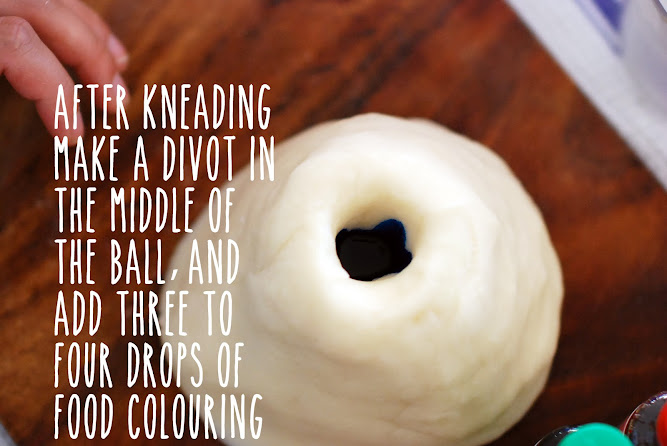
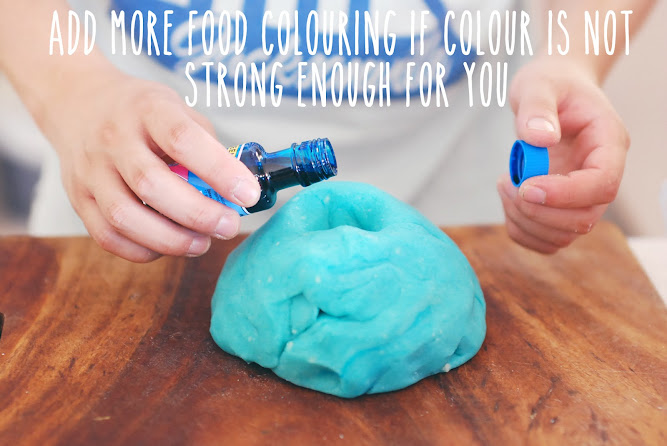
Once satisfied, mould the dough into a a volcano shape, add a divot with your thumb in the centre. Add 3-4 drops of food colouring into the divot. Don't over-drop, it's better to add food colouring as you go if you find the colour is not strong enough. Then fold and knead the dough so that the colour is kneaded through. Gloves are optional, if you don't want to stain your fingers and nails.
Note: I made up some of my colours by mixing two colours together in a small bowl before transferring to the dough (I couldn't find some of the colours I wanted). For purple: mix blue and pink. For Orange: mix red and yellow. If you want brown (for some reason): mix purple and yellow together.
Step 3 (Storage and Maintenance): It's best to store your Play Dough in an air tight container/zip lock bag. If it begins to dry out, you can knead a little bit of water through the dough. If its too soggy (due to high humidity in the weather), you can try to reheat if over the stove to dry out the excess water.
The Play dough is safe for children and adults and it's a salty edible toy (I wouldn't recommend trying it though...). Also note, do not let your dogs near it as they can get sick from the excess of sodium if they eat it. You can even bake it in the oven to make ornaments and statues.
I personally used my play-dough for my best friend's hens night, for something called the 'Pecker Game' where the guests had to mould a pecker into what we thought the groom's pecker was to look like. Happy Play-Doughing!


Excellent - I love playdough!
ReplyDeleteTotally making this when bub is big enough...might make different things though,lol
ReplyDeletex. PixelHazard | Bright Green Laces |
This is hilarious! I would have loved to make these for my firend's hen night! x Remie
ReplyDelete